Weintraub: Result an Inspection with a Checklist in InspectorConnect
- 05 Aug 2024
- 1 Minute to read
- Contributors


- Print
- DarkLight
- PDF
Weintraub: Result an Inspection with a Checklist in InspectorConnect
- Updated on 05 Aug 2024
- 1 Minute to read
- Contributors
- Print
- DarkLight
- PDF
Article summary
Did you find this summary helpful?
Thank you for your feedback
❕ For Weintraub Staff
This article outlines processes that are only relevant to Weintraub staff.
Please Only Result Inspections in InspectorConnect
For Weintraub Inspectors: Resulting inspections must be done in InspectorConnect to get the checklist and other unique functionality.
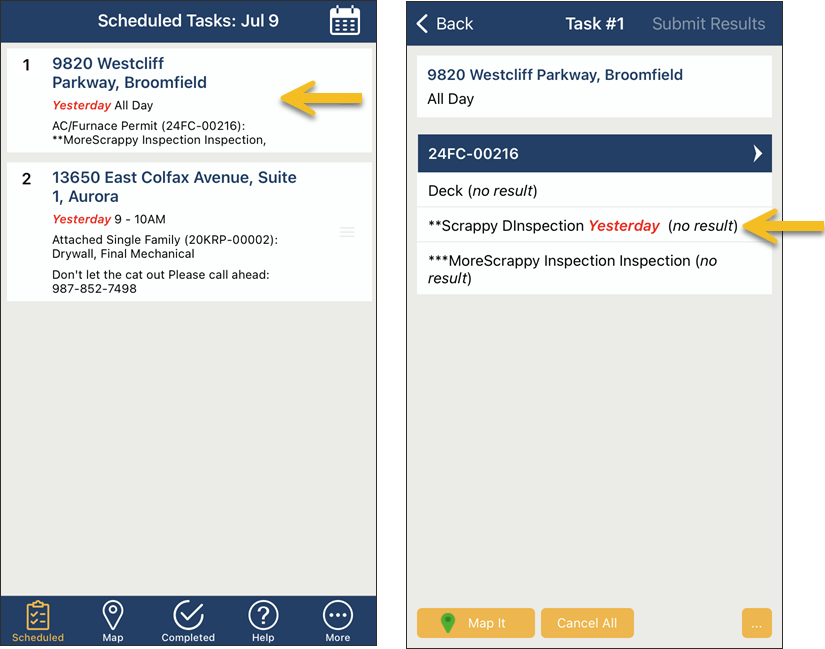
View Scheduled Task (as you normally would)
- From the Scheduled Tasks screen, click the task to open
- Select the inspection you would like to result

Inspections with a Checklist
- Fill out the checklist items
- Based on the your selected checklist values, the result will be automatically selected
- You can add additional result notes
- You can attach photos or document with the result
The pictures/documents will be part of the inspection history but will NOT be part of the special inspection document. In the future, some inspection documents will include photos (Energy Start, Water Star, etc.)

Add Images to Individual Checklist Items
Some checklists will give you the option to link an image to each item on the checklist. This option may not be available on all of your checklists.
- Click the camera icon next to the checklist icon
- Select an image from your photo gallery or camera (take a photo)
- After attaching your image(s), you can (a) edit the file name and/or add image notes or (d) delete the image


Custom Inspections
This is an example of a Custom "Blower Door" Inspection.
- Fill out the form fields
- Based on the field values you enter, the result will be automatically selected
- You can add additional result notes
- You can attach photos or document with the result
The pictures/documents will be part of the inspection history but will NOT be part of the special inspection document. In the future, some inspection documents will include photos (Energy Start, Water Star, etc.)


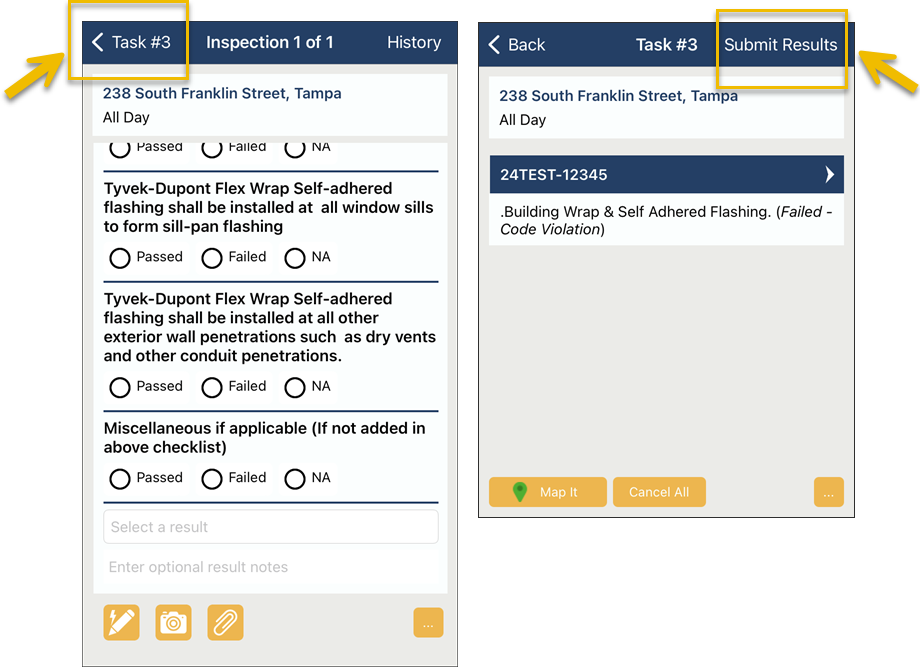
Return to Task Screen and Submit
- After updating the result, click < Task in the top, left corner of the screen to return to the task screen and select Submit Results:

Quick Tip
*↔ Swipe to quickly move through multiple inspections on a stop. *
When there are multiple inspections in one task, you can swipe left and right on the screen to move between the inspections, like this:
